Toolkit Basics
Projects
After creating an account and logging in, you can now access projects. To view a previously created project, you must be added to the project by a superuser. (See User Access and Index Management).

An example of projects view
If you don’t see something like the screenshot above, click on Projects in the upper left corner.
The projects view button
The blue ribbon in the top is the main menu and is used to access all other parts of the toolkit. The numbers after the menu items Lexicons, Models and Tools shows the number of resources already present in an active Project.
The Projects view gives you an overview of different projects in the corpus.
In this view you can:
create a new project (see more at Creating a New Project)
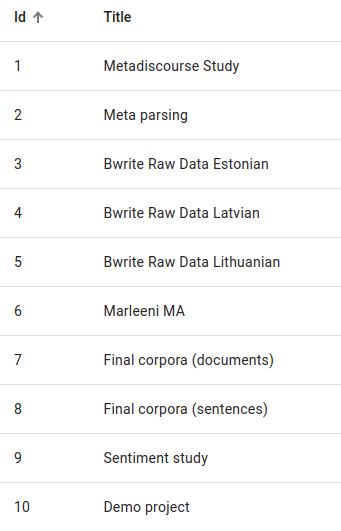
view project IDs
view project titles
view project authors
view indices in a project
view resources in a project
view users in a project
select the project you’re currently working on
see if the application has any problems (more about this in Health)
Finding a Project
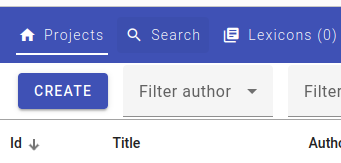
You can filter the projects in this view by author name or by title in the grayed out search boxes next to Create.

You can also sort the projects by pressing on the words id, Title, Author, Indices, Resources or Users and sort them either in ascending or descending order for numerical values or in alphabetical (or reverse alphabetical order) for word values.
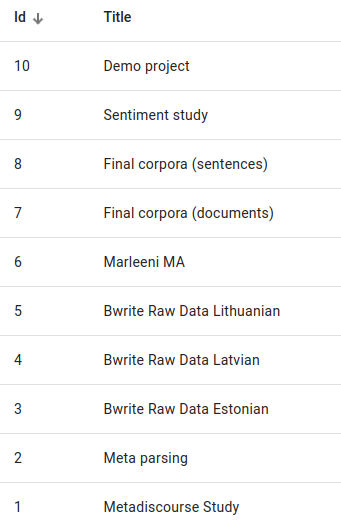
Sorting by ascending and descending ID values.
Using a Project
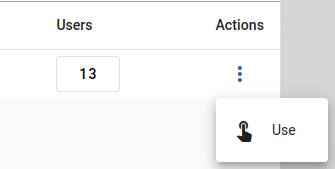
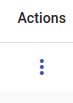
To pick the project you’re working on, choose your project in the Projects view, then click on the three dots under Actions and pick Use.
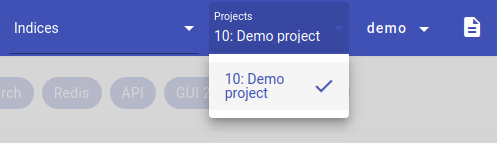
Another way is by picking the project from the Projects drop-down list in the upper right corner of the screen.
View indices, resources or users in a project
You can click on the number of indices, resources or users in a project to get more information. You can view the usernames associated with a project, see index names used in the project or view the number and type of resources used in the project. This only works if there are any indices, resources or users to display, otherwise the number will be a gray zero (0).
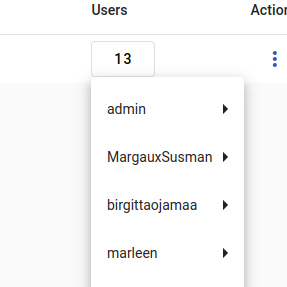
Viewing users
Search view
After selecting a project, you can now search for documents in that project. The Search view allows you to search for documents in an index (read more about Indices).
Access the Search View
You can access the Search view by clicking on Search in the upper left corner.
In this view you can:
view documents in an index
change the number of documents displayed
change how much and what information is displayed
save found documents (see more in Downloading Data)
view saved search queries, create aggregations of search intersections and use more searching tools (more information in Searching)
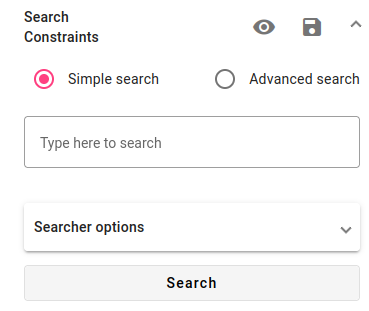
Search view options
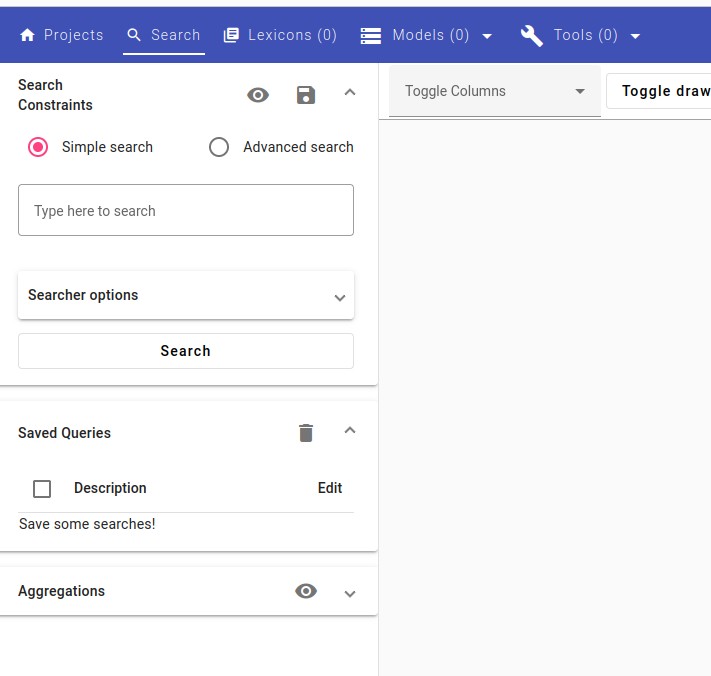
The screenshot above shows the Search view with no index selected. On the left is the Searcher, which allows you to see searches, saved queries and as aggregations.
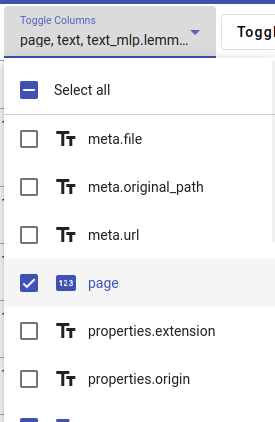
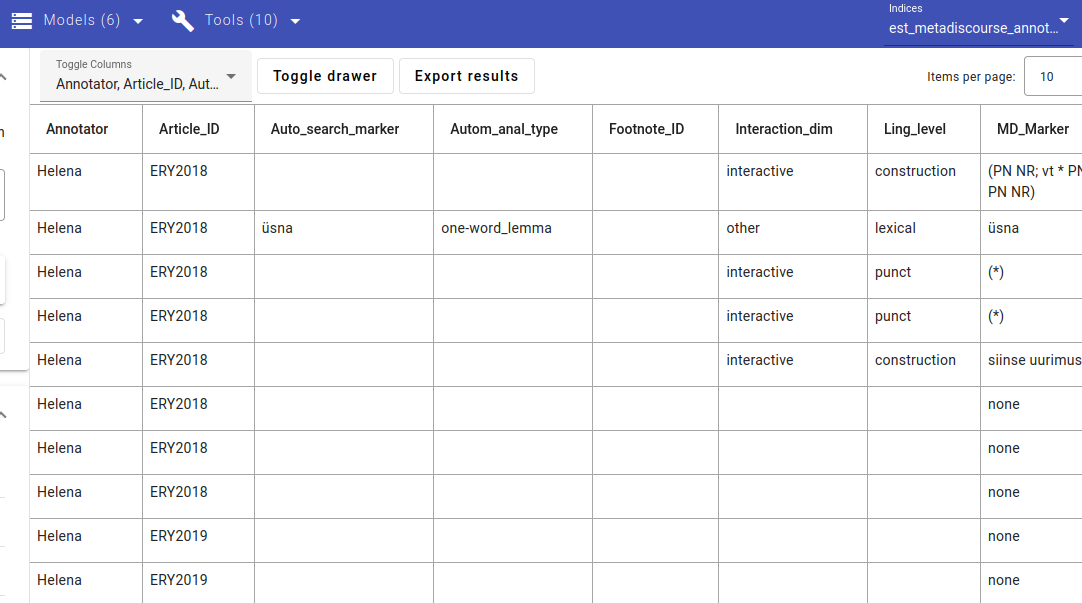
While viewing an index, you can toggle which columns you’d like to see by clicking on Toggle columns.
For example, when looking at a large amount of documents, perhaps you only want to view the page number and text, while not including all the metadata that might be shown automatically.
To do this, you pick which columns you’d like to view from the drop-down menu depicted below. You can also pick to Select all. Click anywhere else to reload the data.
An example of toggling columns to select what fields to view
Note
You can also hide the Searcher by clicking on the Toggle drawer button for a better view at the data.
Change documents per page

You can choose how many documents to show at once by clicking on Items per page on the right, under your username and the projects and indices drop-down menu. A drop-down menu will appear, where you can choose from 1, 10, 20 or 50 documents.
Navigating through documents
You can navigate to a different page using the buttons in the upper right corner under the menu bar.
The < and > buttons move to the previous and next batch of documents, while << and >> go straight to the beginning (starting at document 0) and end of the documents (up to 10 000).

Information about documents currently being viewed is to the left of the buttons:
1-10 in the screenshot above shows the amount of documents shown and their numbers (1-10, so 10 documents). Going forward one page would show documents 11-20.
The numbers in parentheses (18538/18538) show the amount of documents found using the current search parameters and total amount of documents.
So, for example if we make a query in the same index that is associated with 220 documents, the result will look like this, indicating that search is displaying 220 documents of 18 538:

Sorting data based on fields
You can sort the data based on the values in a field (column) similarly to sorting the projects (see Finding a Project).
Click on the fields you wish to sort by to sort the items in ascending order (↑ should appear next to the field).
Or click twice for descending order (↓ should appear next to the field).
For text fields, this means sorting alphabetically or in reverse alphabetical order.
Unsorted documents.
Sorting by ascending filenames.
Sorting by descending filenames.
Indices
Indices are a collection of documents. Documents in indices are viewable in the Search view, where one row indicates a document and columns indicate different fields.
Picking an index to look at in Search view
First, pick a Project (see more information in Projects) and navigate to the Search view (more about this in Access the Search View).

Then, in the upper rightmost corner you can click on the field Indices to access a drop-down menu.
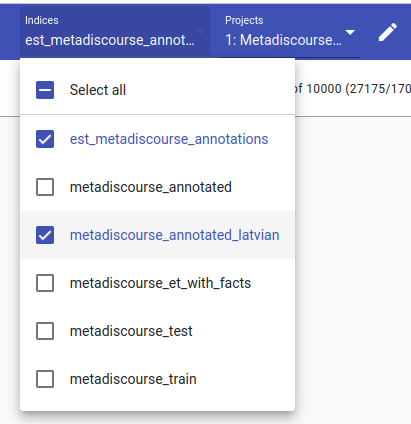
You can either Select all or pick which indices you wish to see at once in the Search view.
Note
For larger indices, especially ones with longer documents, we recommend viewing only one index at a time.
Click away to close the drop-down menu, then press Search in the Searcher window to see the results.
The result - data is displayed.
Facts
Facts or texta_facts are metadata that is added to or extracted from documents. Applying metadata as facts makes it easier to search for and aggregate documents.
See Data Extraction and Classification to add your own metadata as facts.
Applied facts can be edited or deleted either individually or using mass edit/delete tools, see Editing and Deleting Facts (Facts Manager) for more information.
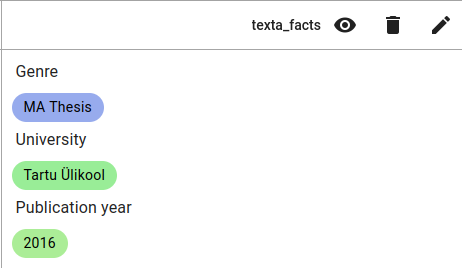
An example of a thesis with metadata. Genre is MA Thesis, University is University of Tartu and Publication year is 2016.
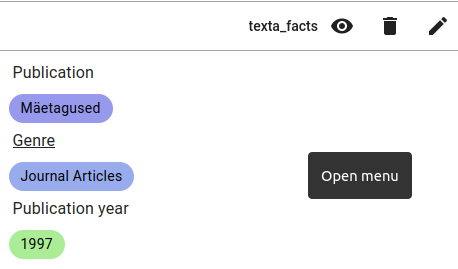
An example of a journal article with metadata. Genre is Journal Articles, Publication (name) is Mäetagused and Publication year is 1997.
You can hide irrelevant facts by clicking on the eye icon ( ) next to texta_facts shown in the screenshot above.
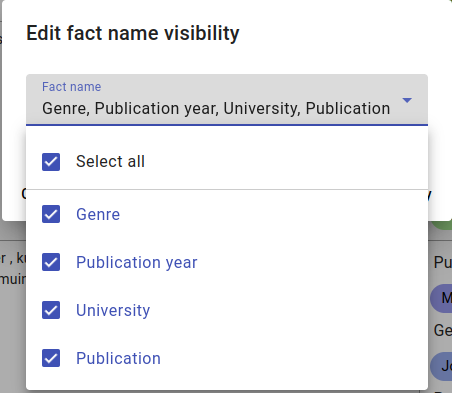
After clicking the eye icon, the Edit fact name visibility menu will appear. Click on the Fact name field to access the drop-down menu.
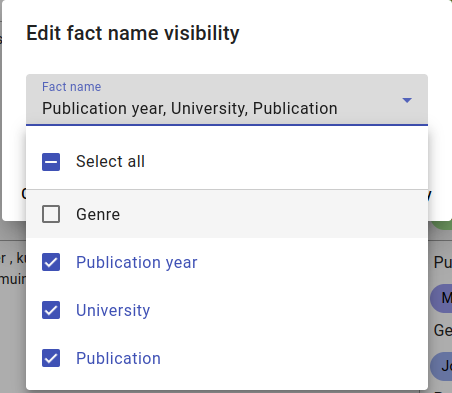
Deselecting Genre from visibility.
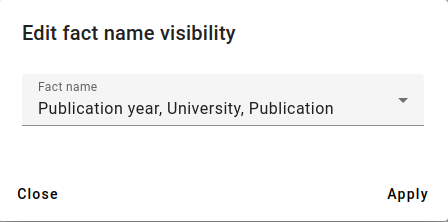
Pick the fact names you want to see, then click on Apply.
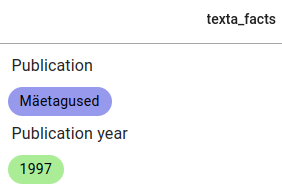
The result of hiding the Genre fact from the example journal article.
Tools and Models

Tools and Models in the menu.
To use any of the tools (in the Tools menu) or models (in the Models menu) in the Toolkit, you must create a task.
For example, if you click on Dataset Importer in the Tools menu, you will see a mostly empty screen.

Example from Dataset Importer.
On the left are buttons for creating a new task (Create), a wastebasket logo for deleting tasks and search fields for filtering tasks by description or status.

And on the right you have the option of changing items (tasks) shown per page and navigating through pages.
If you have already created a task, it will be shown under the menu, as described above.

An example task.
Most of the tasks will include description, author name, dataset and time started/completed with a taskbar for showing the progress. You can click on any of the tasks for an overview of the parameters used to create it. Most tasks also have an Actions menu with three dots.
The actions menu.
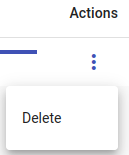
The actions menu after clicking on the options.
In the case of the Dataset Importer the only action is to Delete the task, but some tasks also have actions like Clone or Edit. Besides the Create and Delete buttons, there might be other options, for example Apply to text.