Searching
Simple Search
First go into the Search view and select a project and index to view. Look at the Searcher window on the left.
The default option and simplest of the search options is to do a Simple search. This search will look through all of the documents in all fields for a match.
To do the simple search, type in the search field (with the text Type here to search) and press Search for results.
For more advanced searches, either switch over to Advanced Search or click to open Searcher Options.
The search text will be highlighted in a random color and the document count on the right will show many document matches were found (more information about query matches in Change documents per page and Navigating through documents)

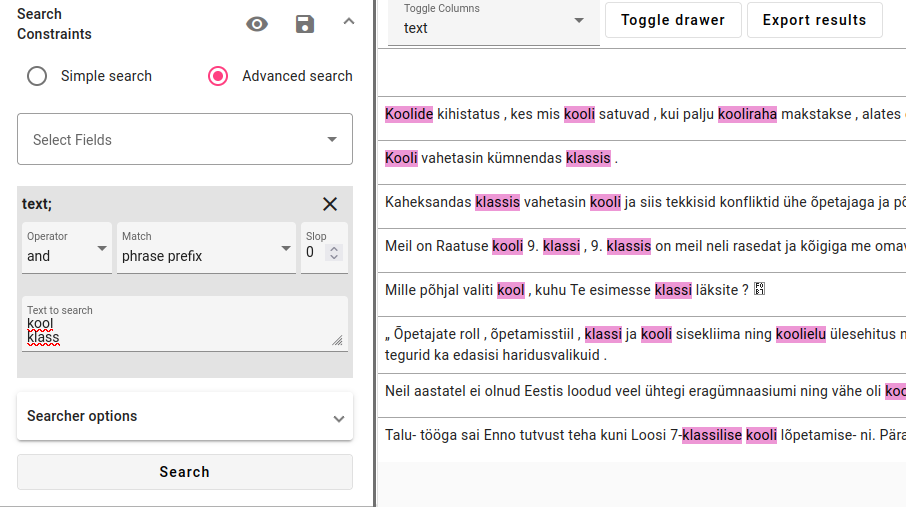
An example of simple search results with the word “kool”. The results are highlighted in pink in this example, but could be in another color for another search. The simple search also looks for matches at the start of a word.
Choosing Search Field
While using simple search, if you have similar data in several fields, both fields will be shown in the results.
An example of finding similar results from both lemmatized text and regular text.
To get results from a single field, you could use Advanced Search and specify the exact search field.
Or you could use Toggle columns to only view the fields you are interested in (see more about this in Search view options).
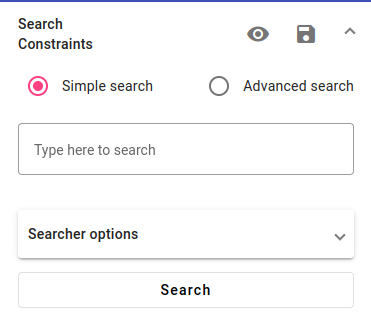
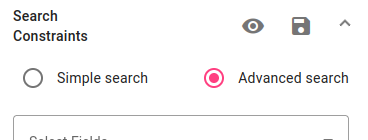
Advanced Search
Advanced search allows you to search for specific fields and make more complex searches.
Pick Advanced Search in the Searcher.
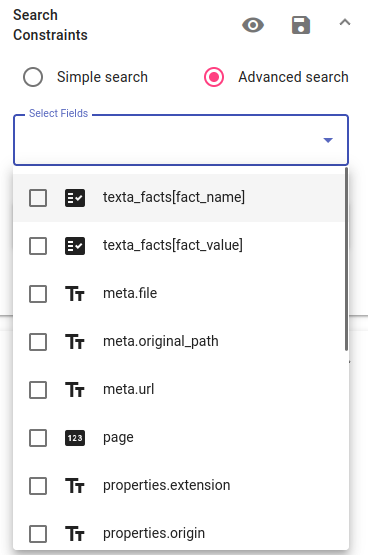
Select a field to search from.
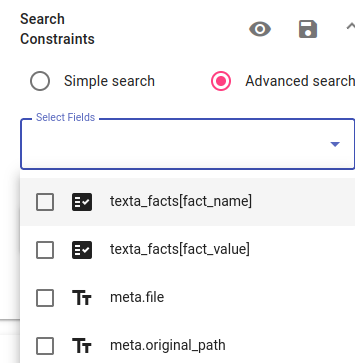
The drop-down menu selection for choosing the search field.
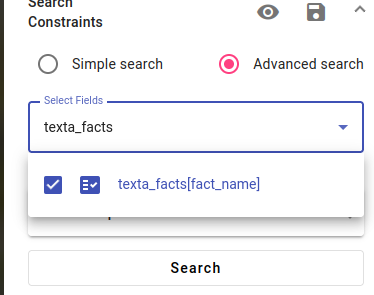
Choosing the texta_facts fact name field.

After clicking away, a search box for the field appears.
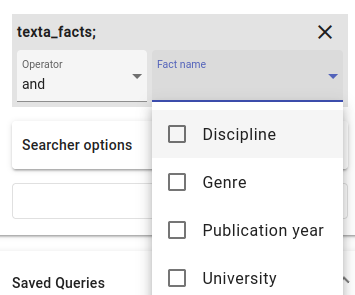
It’s possible to specify advanced search using Operators, choosing the match type and slop value.
You can specify the search using Operators:
and
or
not
You can also specify the search using the Match Types:
phrase prefix
best fields
phrase
regex
exact term
fuzzy term
fuzzy phrase
You can also add more fields or more of the same field to narrow the search even more.
If you want to get rid of any selected fields or fact values, press the X button next to the field name.
An example of options that pop up when selecting a text field.
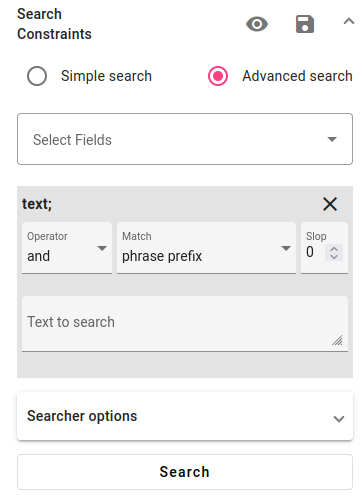
For text values, you can also enter several search words or phrases by adding each item on a new line.
An example of searching for two words. Each word is on a new line.
Additionally, you can use the Slop value, for example to find phrases that could have one or more words between them.
Note

You can make the Text to search box larger or smaller by clicking and dragging it from the lower right corner of the search field box (with the icon of diagonal stripes).

Expanding the search field.
Operators
The operators and, or and not can be used to specify a search.
Click on the Operator field to open a drop-down menu. Here you can choose whether the search match needs to contain:
all the words in the search (and)
at least one of the words in the search (or)
none of the words in the search (not)
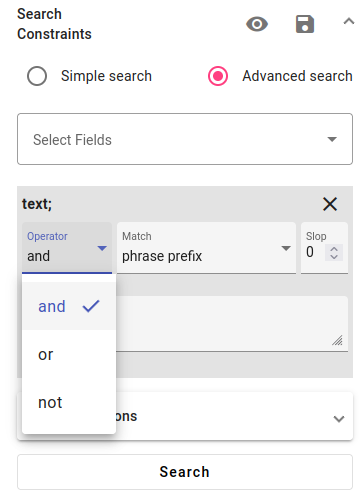
Specifying operator type for an advanced search.
Finding documents (sentences) that contain the words kool and klass. Both words must be present.
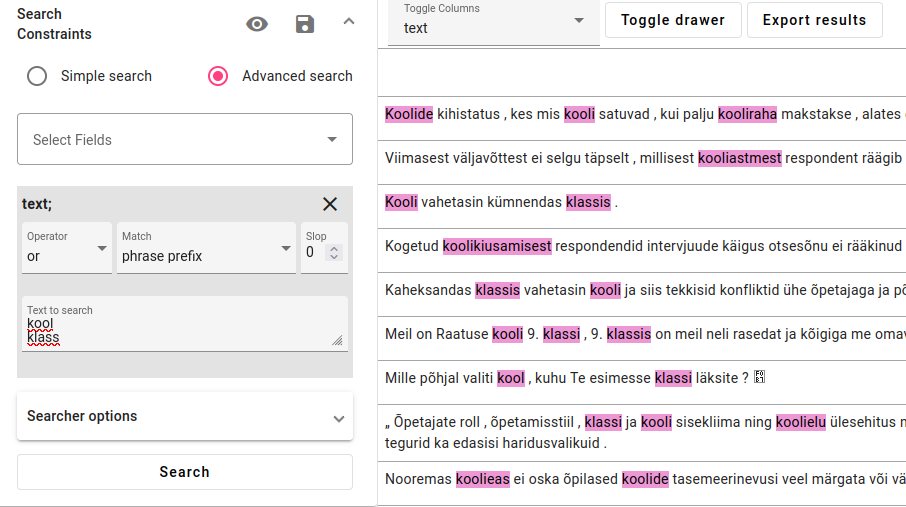
Finding documents (sentences) that contain the words kool or klass. One of the words must be present.
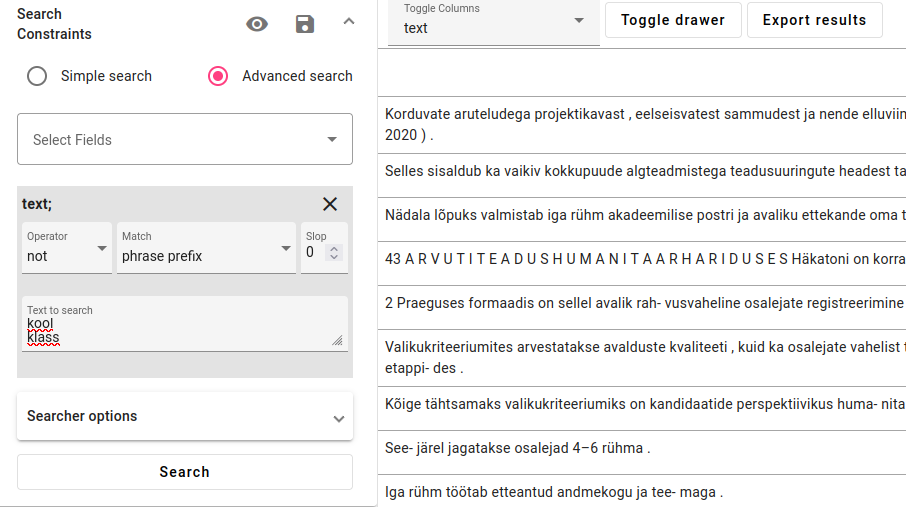
Finding documents (sentences) that don’t contain the words kool or klass. None of the words can occur in the document.
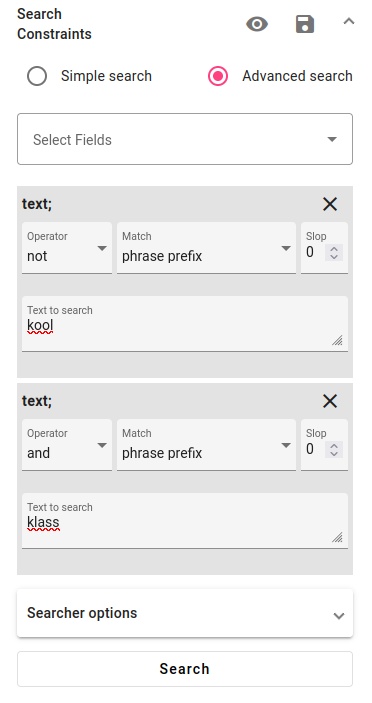
To conduct a search where one word must be present and another may not be present:
Select the field and word that must be present with and / or operator.
Next, select the same field and specify the new search constraint with the operator not (the one that should not be in the text).
For example: the query for finding documents (sentences) that contain the word klass, but not kool. One of the words must be present, the other one cannot be present in the same document.
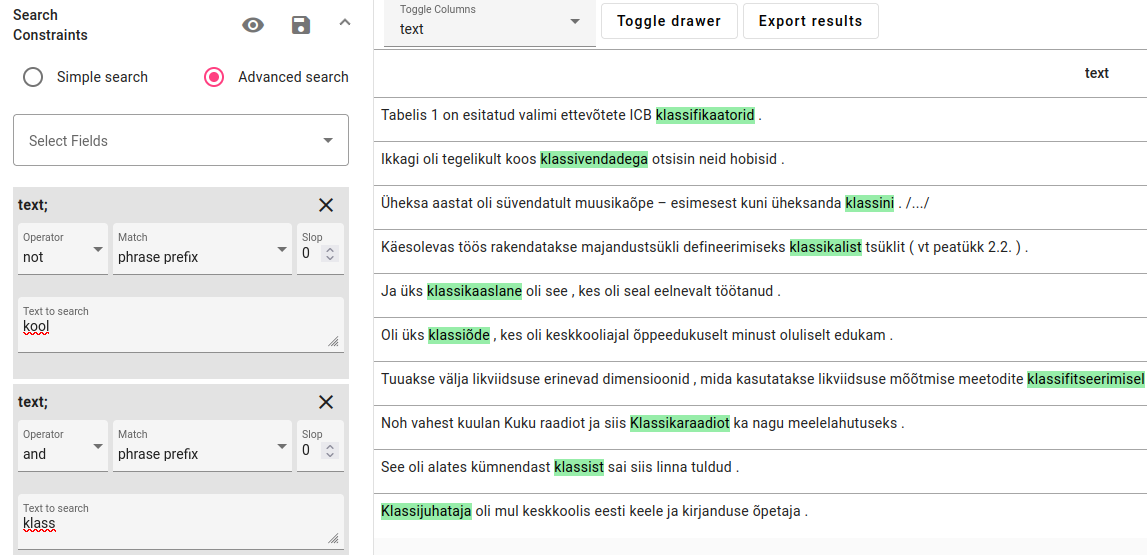
The results for the query: documents that contain klass, but not kool.
Match Types
You can change the match type by clicking on the Match field. The different types of matches are described below.
Phrase prefix
Phrase prefix searches for any words that begin with the search term.
For example, if we search for klass, we will find words like klass, klassika, klassikaaslane, klassifikaator etc. It can be useful to find words that are conjugated or have declension. So for the Estonian example klass, we will also find klassis, klassi, klassile, klassiski etc.
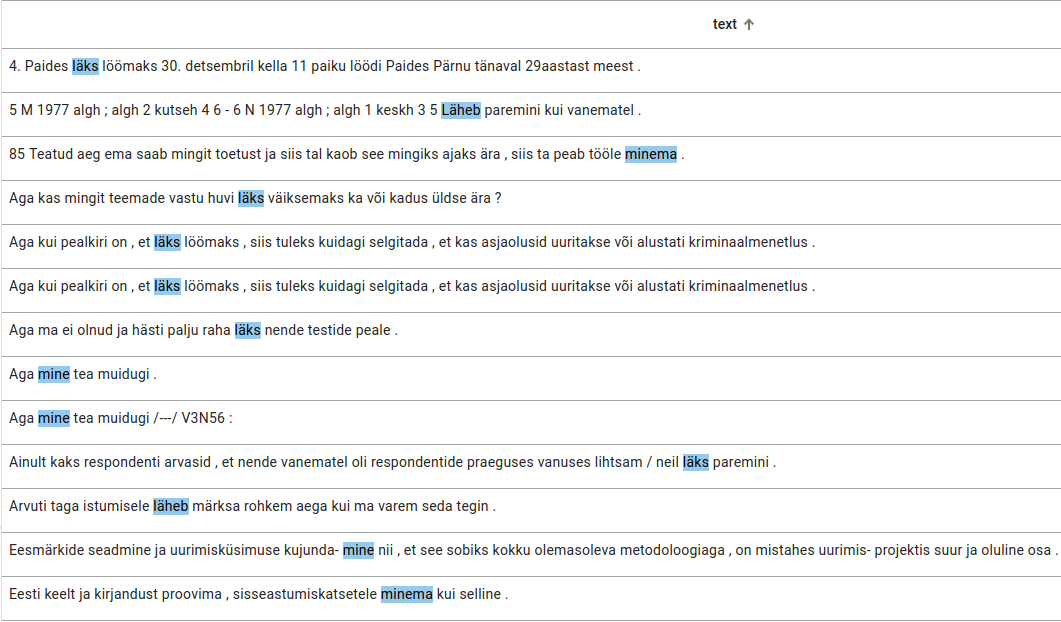
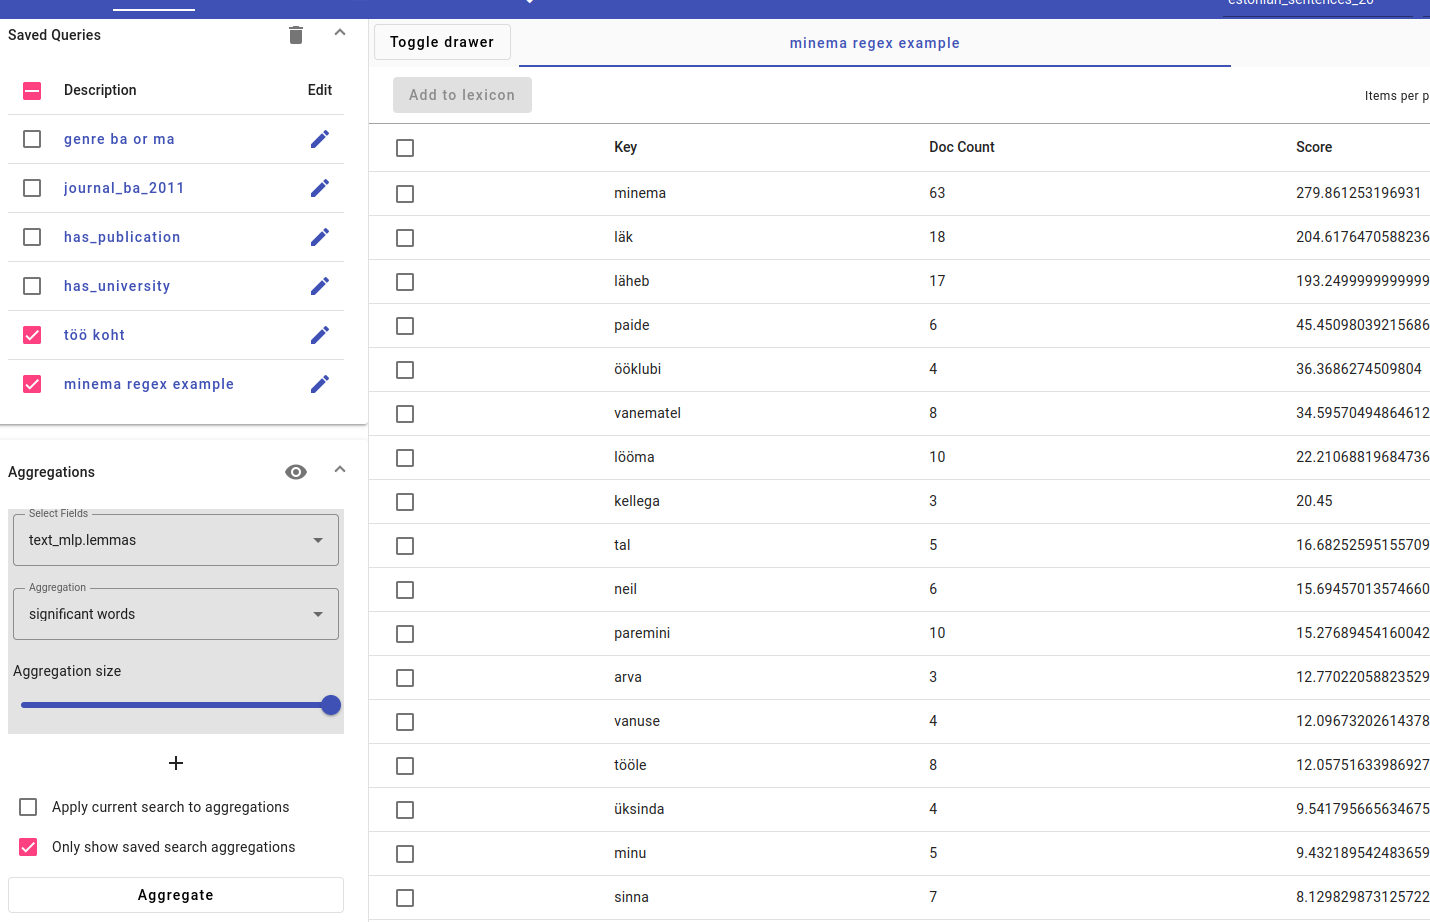
For words that have stem changes, it is also possible to search by entering the word stem and using the or operator, for example searching for different forms of minema (et to go) using forms like läheb, läks, mine.
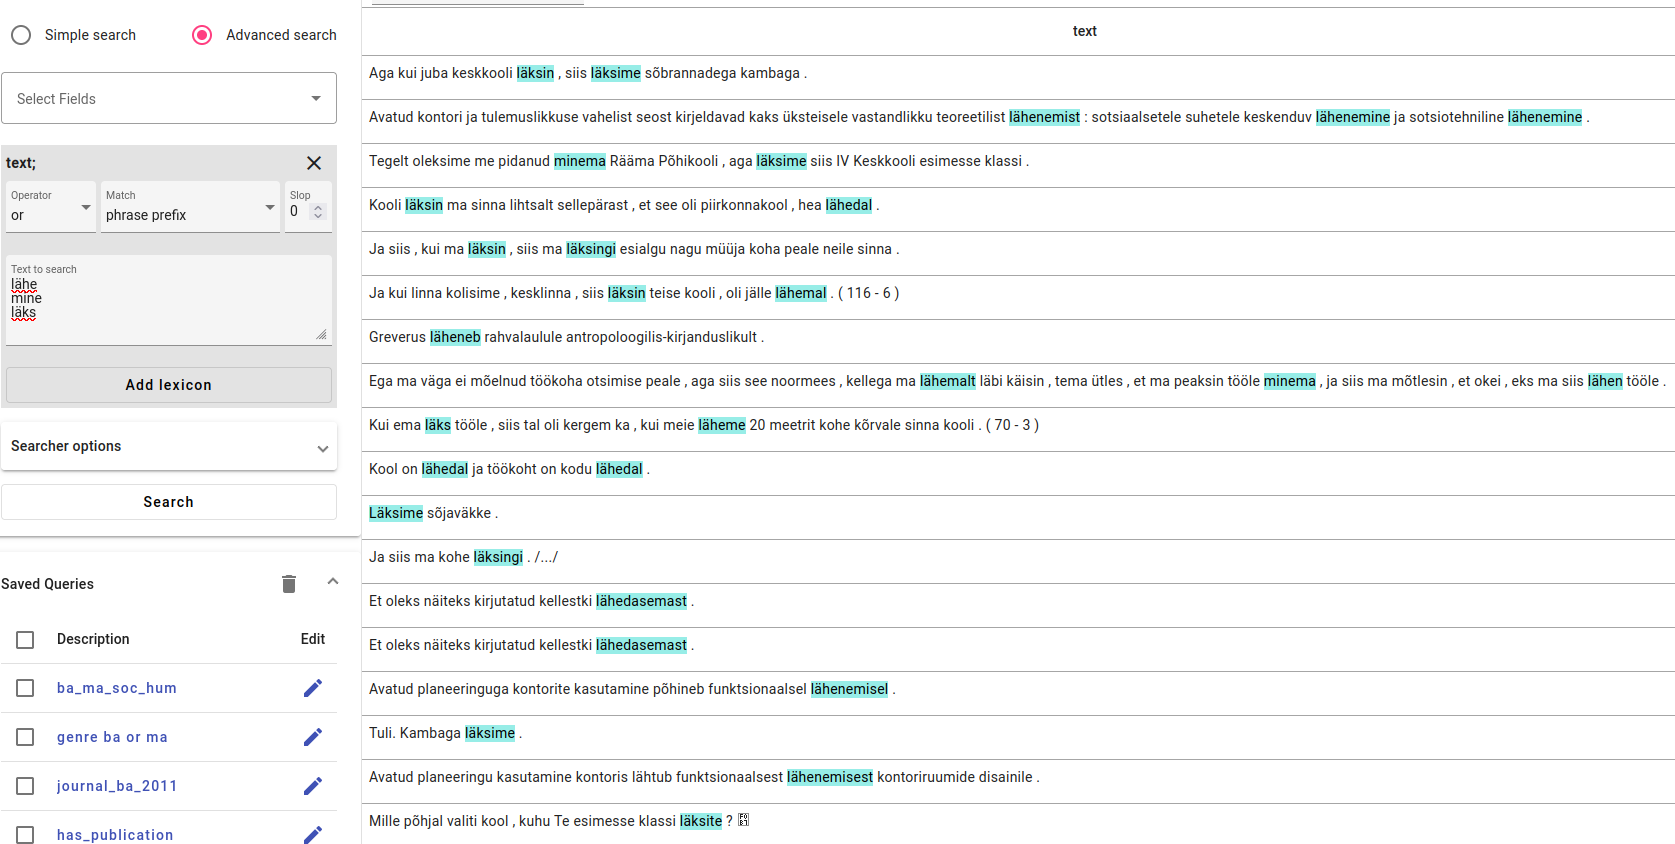
Searching for different forms of a verb using phrase prefix match.
Note
Searching with phrase prefix match can find a lot of irrelevant documents. For example, the phrase prefix search shown above could also find very different words like mineraalne, minestus, minevik etc. It is possible to make the search more accurate by providing longer word forms like minem etc. However, for more exact searches using regex match is recommended.
Best fields
Best fields tries to find the one document where all the search words or search phrases are present and more closely together, but also finds partial matches based on individual words.
Phrase
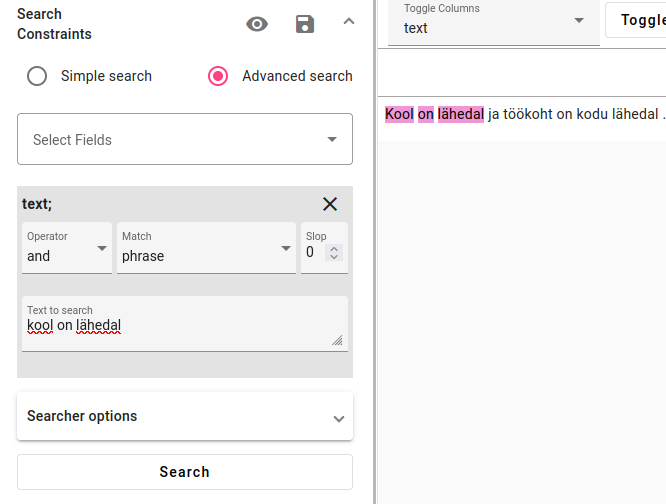
Phrase is used to search for an exact phrase or exact word. For example, if we want to find the exact word klass.
Searching for an exact phrase.
Searching for an exact word with phrase match type.
Regex
Regex match type can be used to search with regular expressions. Read more about Elasticsearch regular expressions here.
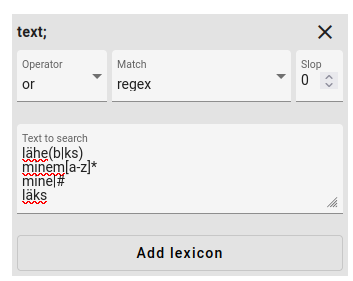
in lähe(b|ks), () indicates a group where | separates two options, läheb or läheks
in minem[a-z]* searches for minem and then any lowercase letter [a-z] for any total length * to find forms like minemine, minemisest etc
mine|# finds the string mine with no other options using #
läks finds the string läks with anything after it
Exact term
Exact term can be used to search the entire content of one field. For example, one entire document or sentence, with punctuation. There is an option to ignore case.
It is only very useful for finding things from keyword fields, in most cases it is better to use Phrase match type.
Fuzzy term
Fuzzy term can be used to find a misspelled word or similar words. You can control the results by using the fuzziness number (number of substitutions).
Prefix length can also be adjusted (how many changes in the word are allowed to be missing letters on the end of the search item).
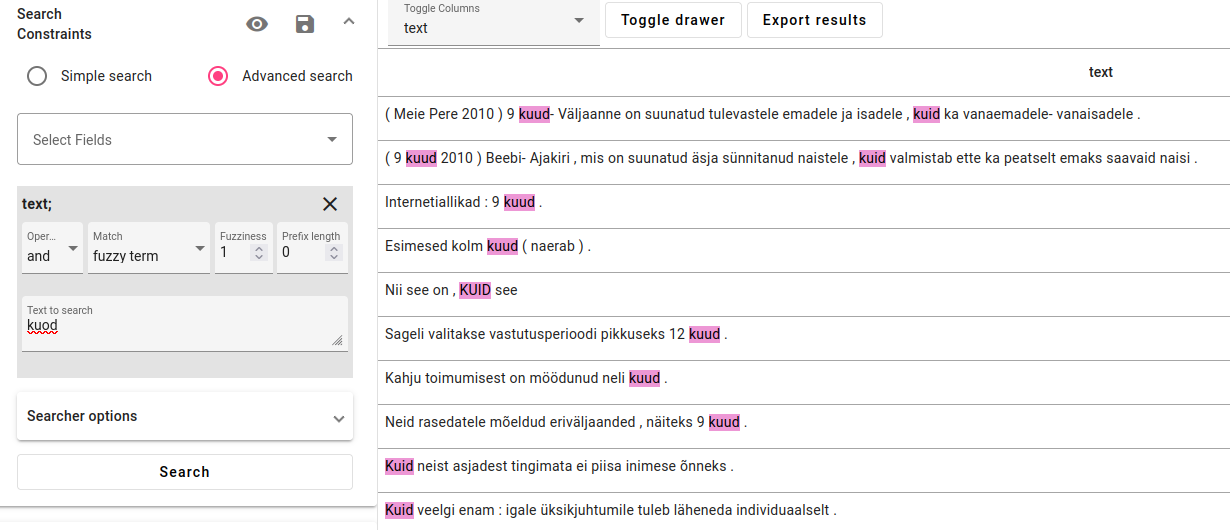
Searching for words that are one letter off from the search term “kuod”.
Fuzzy phrase
Fuzzy phrase is similar to a fuzzy term, but also allows you to find phrases. You can control the results by using the fuzziness number (number of substitutions). Prefix length can also be adjusted (how many changes in the word are allowed to be missing letters on the end of the search item).

Searching for phrases that are one letter off from the search term “kuod seo”.
Slop
Perhaps you only know the start and end of a phrase, but can’t find it using those two separately. Or maybe there is an interesting phrase that you would like to find all variations of.
You can use the slop function for this. Slop specifies the potential amount of words between any of the search words.
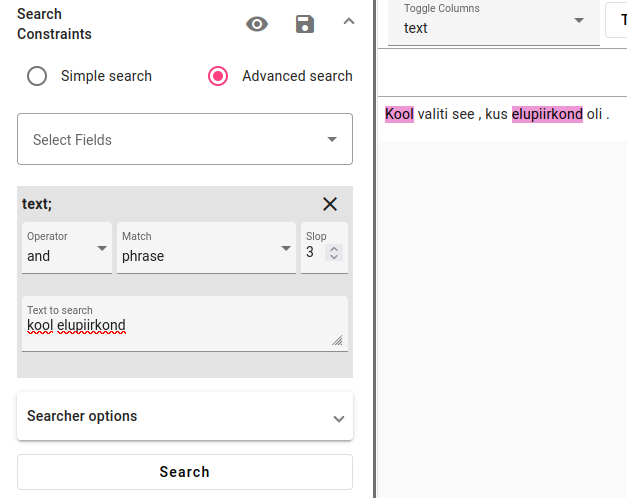
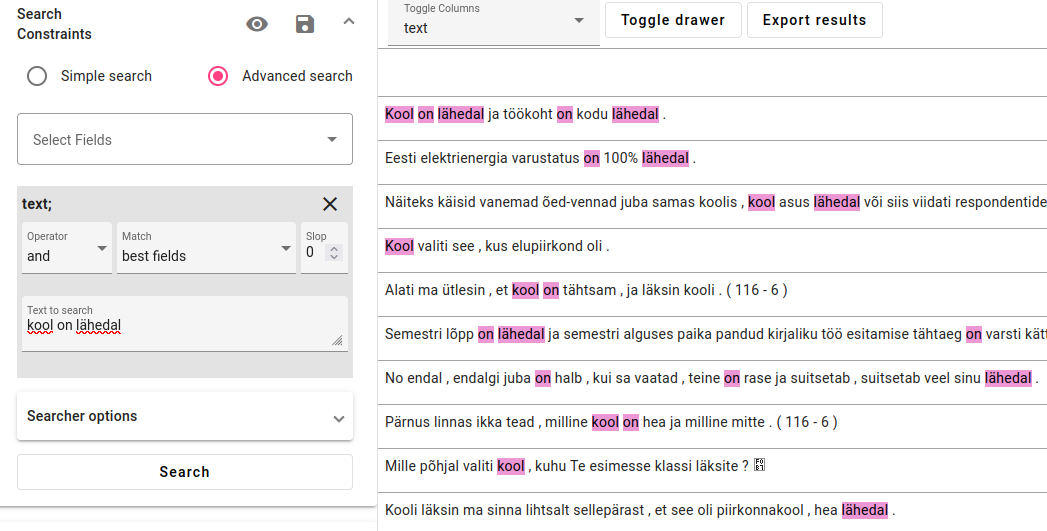
A phrase search for “kool elupiirkond”, with a slop of 3. This means up to three words can be between the two parts of the phrase.
Searcher Options
Searcher options change the display of search results.
The different options are:
changing the highlights on facts
changing highlights on searcher matches
changing highlights on hyperlinks
only highlighting matching facts
viewing the short version of documents (up to 15 words)

Click on the Searcher options in Searcher.
Change any of the options and press Search in the Searcher to update the search results display.
Another way to customize your display is to use the collapse arrows on the three Searcher components Search constraints, Saved queries, Aggregations.

Click on the arrow pointing up (˄) to collapse the Search Constraints.
A collapsed Searcher, which can be opened up again by pressing on the arrows pointing down (˅).
More on the searcher options below:
Highlighting options
Highlight facts highlights any facts in displayed columns, regardless whether they match a certain search query or not.
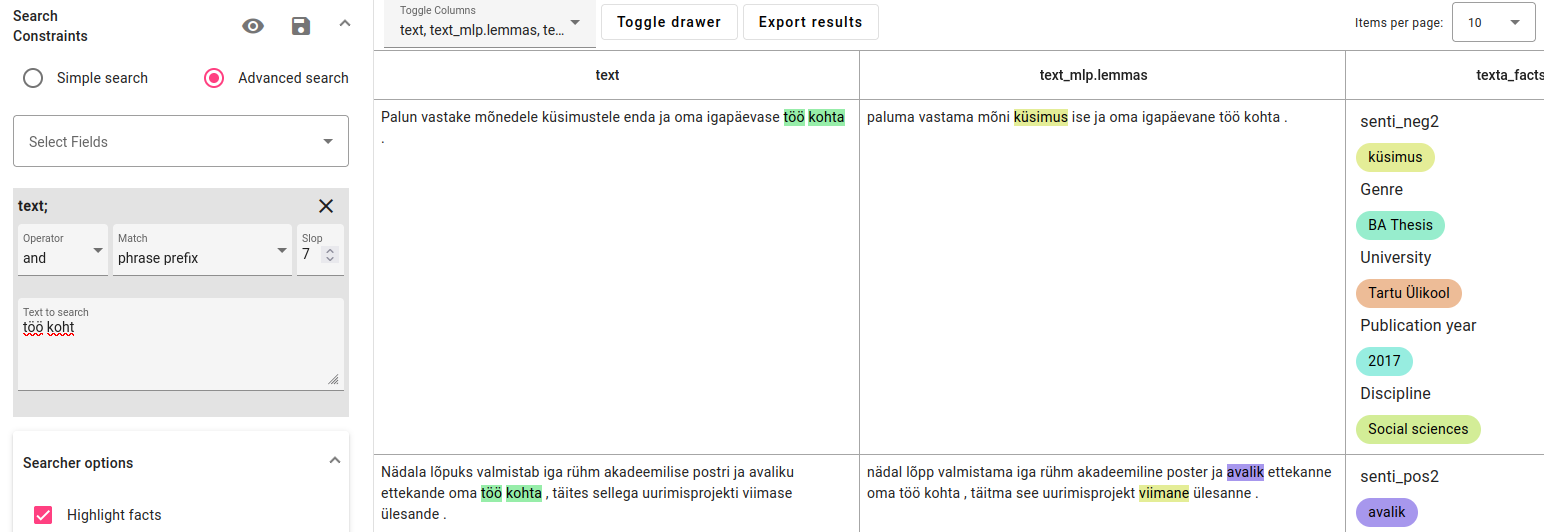
Highlight facts while searching.
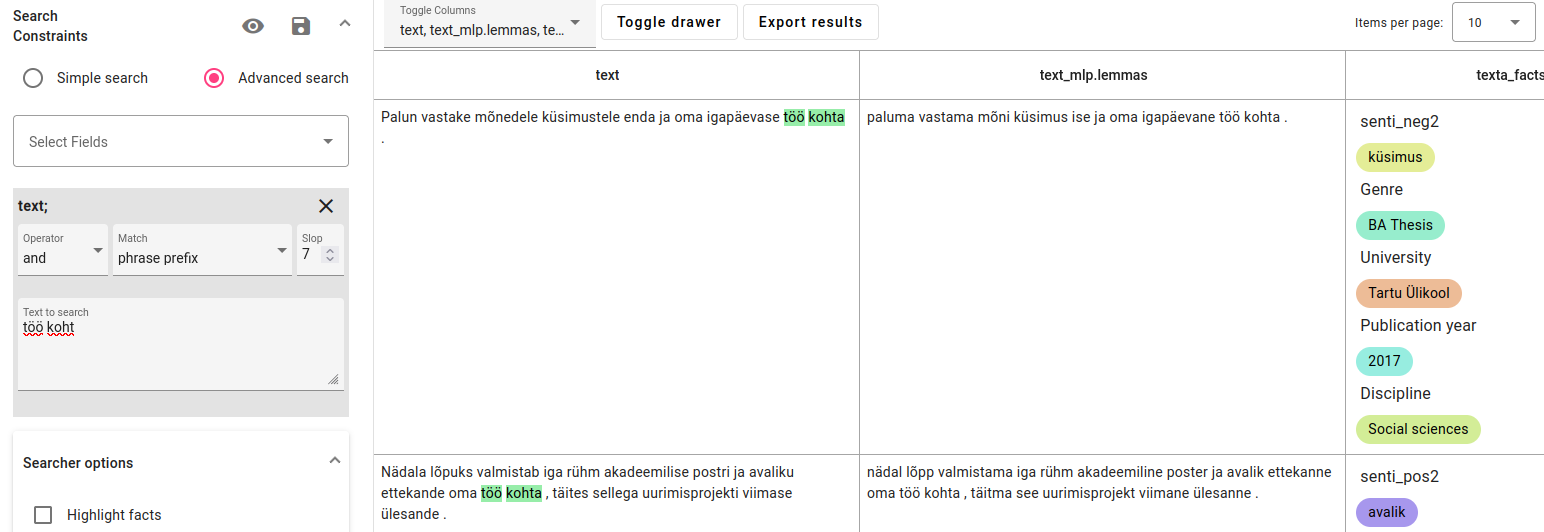
Not highlighting facts during a search.
Highlight matching facts allows you to only highlight any facts that match the current query. For this, you need to also search for fact names or values.
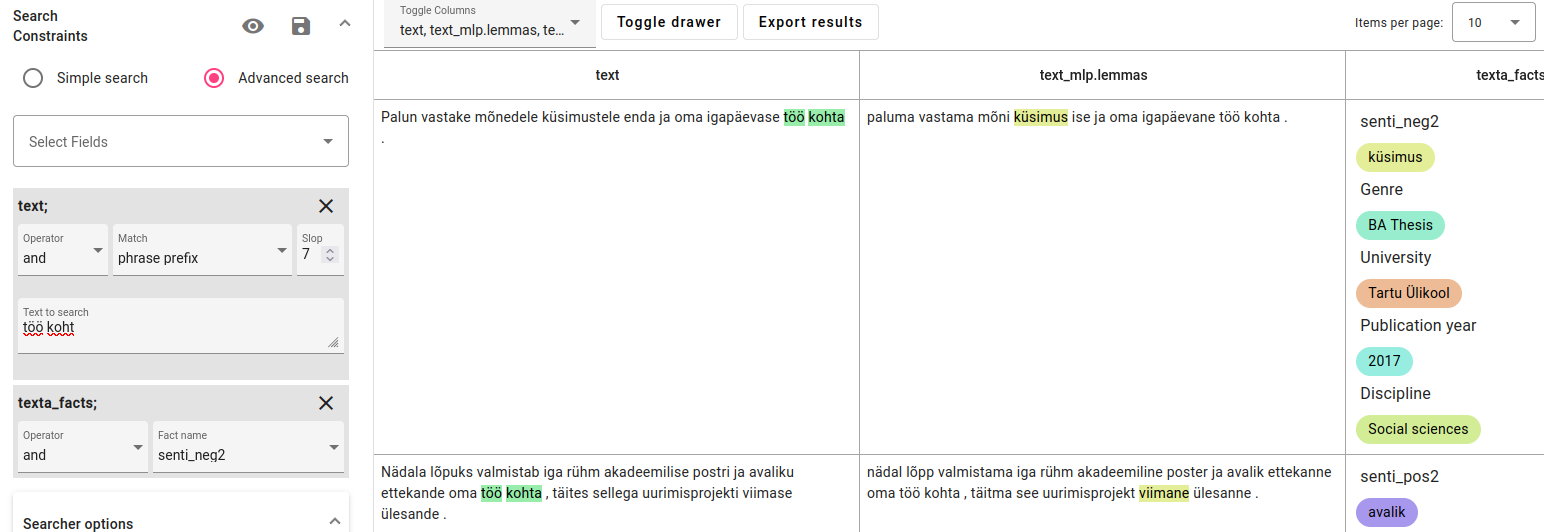
Highlighting matching facts.
Highlight searcher matches can be used to turn the highlighting on the search matches on or off.
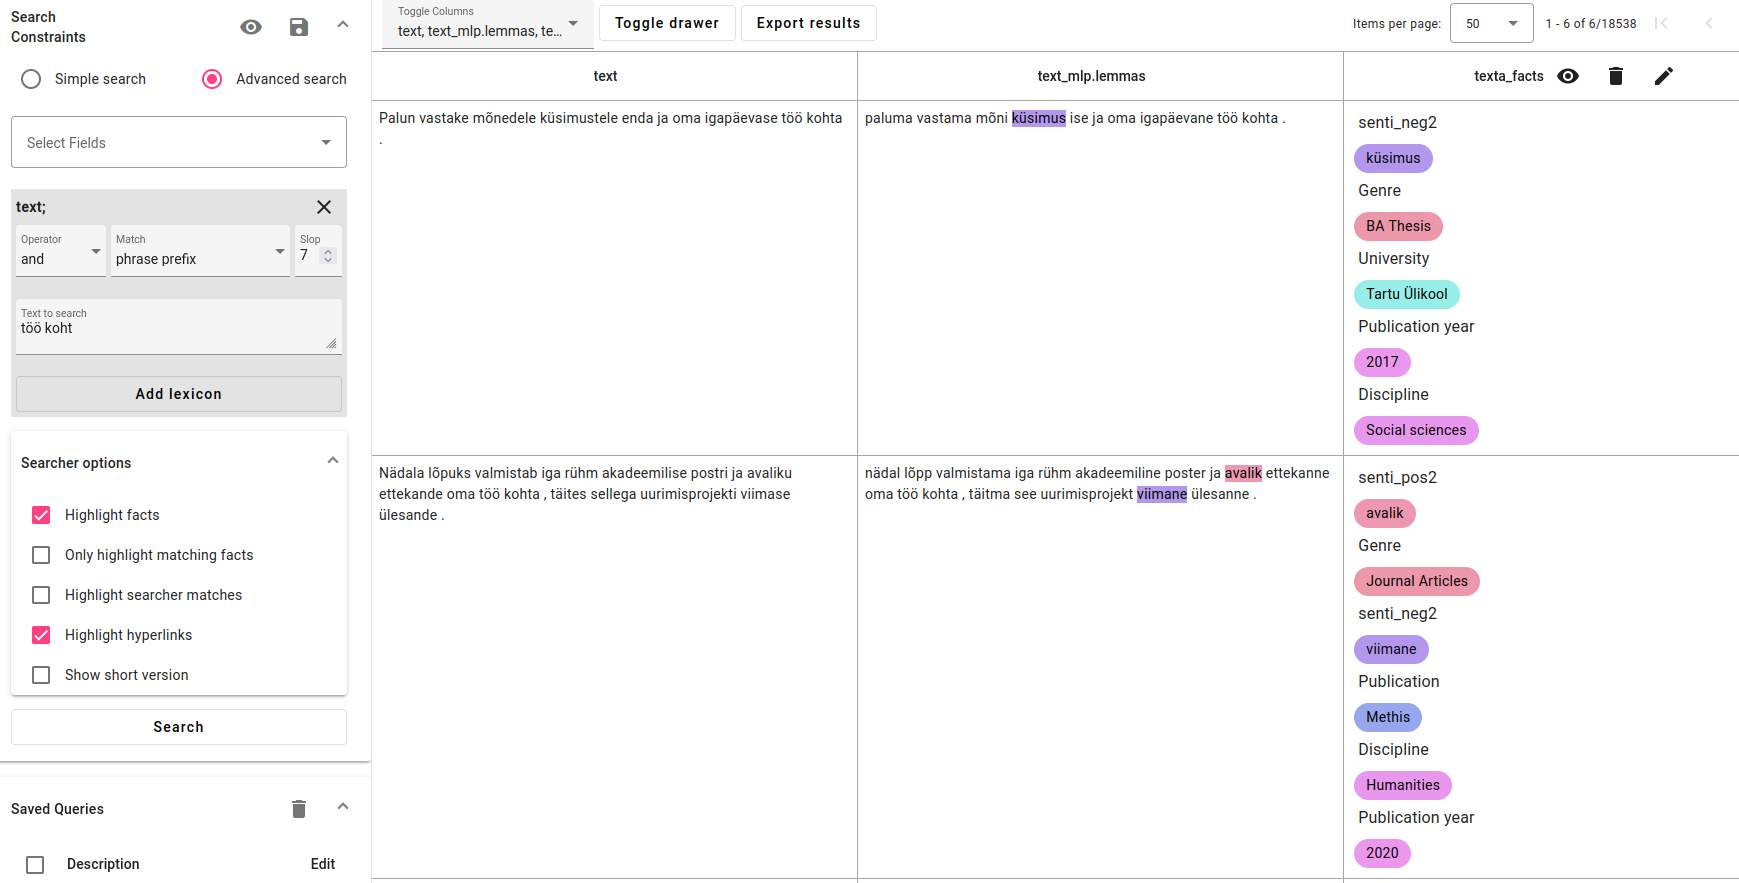
Not highlighting searcher matches.
The Highlight hyperlinks option is used to display hyperlinks as regular text, if you have a dataset full of hyperlinks.
Short version
Viewing the short version of documents is a good way to reduce loading times for long documents, even without using any other search features.
You can choose how many words before the cutoff will be shown, up to 15.
Without any other search functions, it will show the start of the document. However, if used while searching for anything else, it will center on the found match(es).
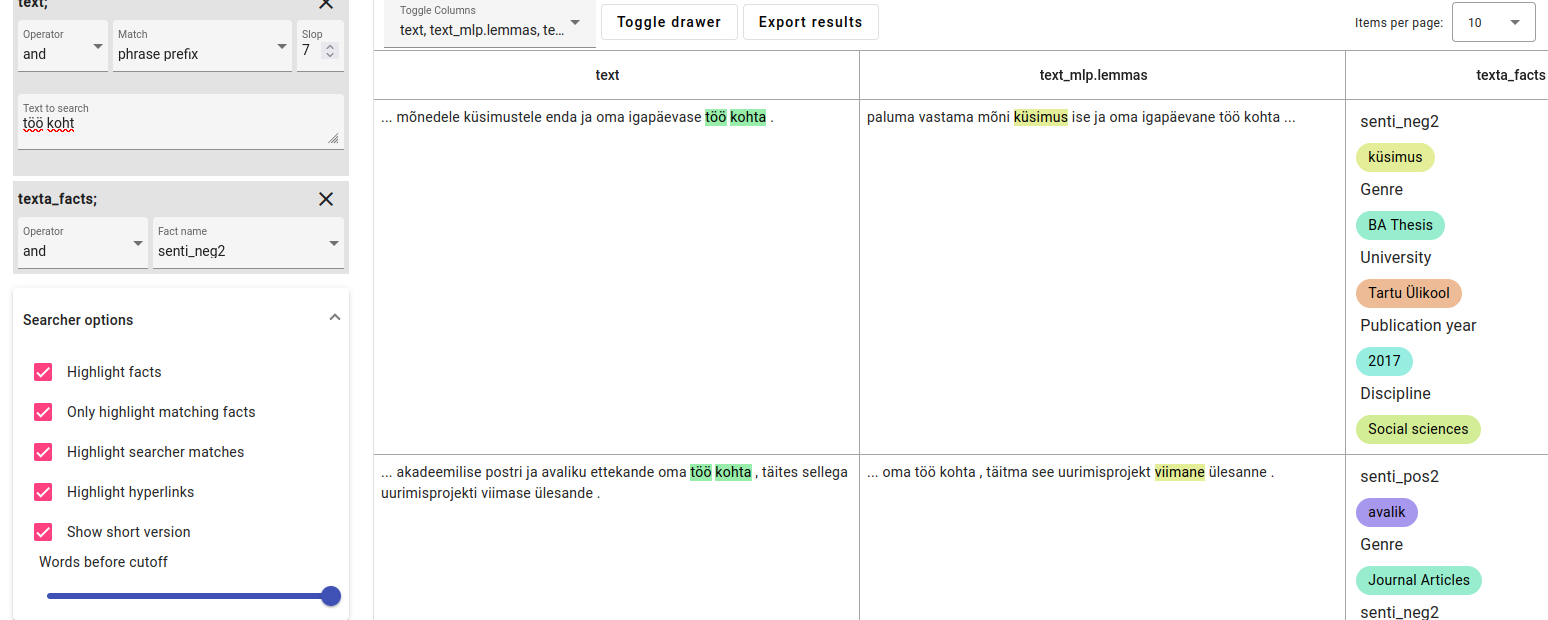
An example of Show short version option with an active search query.
Search Queries
Search queries are a useful way to keep search queries you might need to access regularly.
They are also very useful for separating out a subset of interesting documents without creating a new index. You can later use them for processing, reindexing, adding/editing/deleting facts and more.
View and Save Queries
Below the search constraints are options to view and save search queries.
You can view the search query in its raw form by clicking on the eye icon ( ) shown in the screenshot above. This can be useful for debugging queries, but is only recommended for advanced users.
You can save the search query by clicking on the save icon (
 ) shown in the screenshot above.
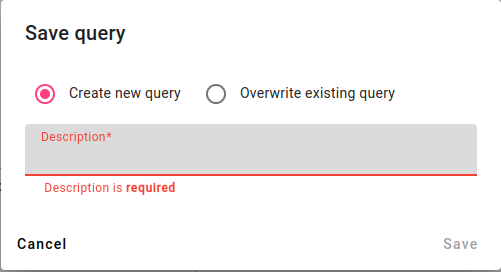
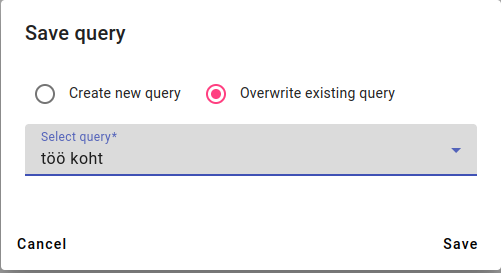
You can either save a new query or overwrite an existing query.
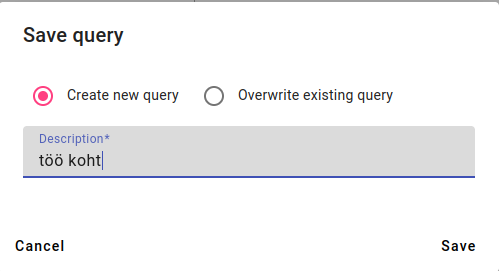
The description you enter for a new query will be shown in the saved queries below. The description of a new query should be relatively short, informative and unique.
After writing the description, press Save.
The saved query description.
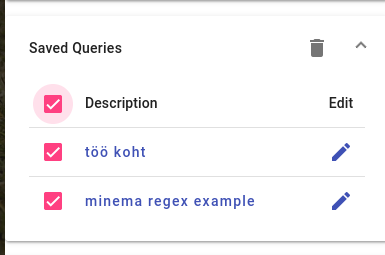
Access a Saved Query
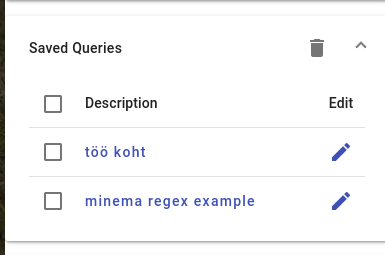
To access a saved query, press on the desired query description in Saved Queries.
This will show you the saved query’s selected fields, operators and match types in the Search Constraints box, which you can then use to activate the query by pressing Search.
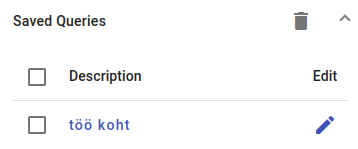
Example of saved queries. We select the first one with the description “töö koht”.
After clicking, we can see the search constraints. Press Search to view the documents matching this query.
Edit a Search Query
Editing Search Query Content
For editing the content of a search query, click on the query.
Make any changes to the search constraints you wish to make, then press the save button.
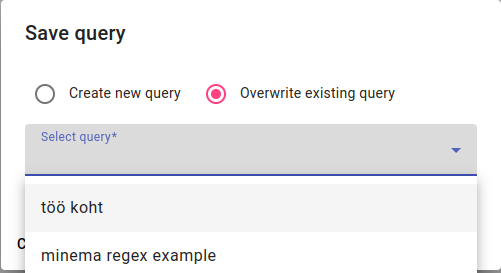
While saving, pick the Overwrite existing query option.
Pick the query you wish to change, then press Save.
Editing Search Query Description
For editing the description of a search query, click on the pencil button (
 ) in the Edit column for the query you wish to edit.
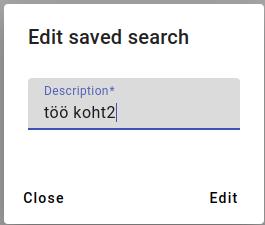
Type in a new description for your query and press Edit.
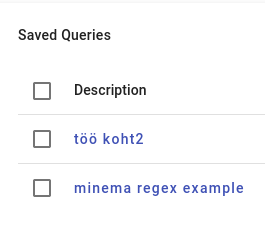
The result of the description edit.
Delete a Search Query
There are small boxes in front of the saved search query descriptions.
Clicking on the first box will select all queries, or you can select specific queries by clicking on the boxes in front of the queries you wish to delete.

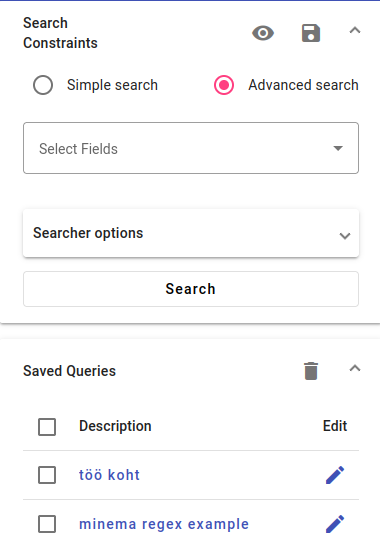
The list of saved queries.
Selecting all queries to delete.
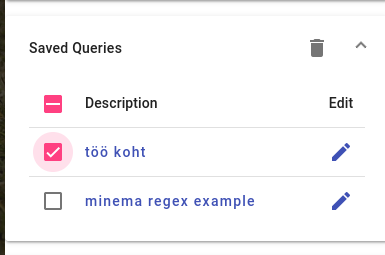
Selecting one query to delete.
Press the Delete button (
 ) to delete any selected queries.
A window will appear for you to confirm that you want to delete this number of selected search queries. Press Delete to confirm the deletion.
Searching with Metadata
To use metadata while searching, use advanced search and for the search field select texta_facts[fact_name] or texta_facts[fact_value].
The fact_name option enables searching for any documents that have, have one of selected values or don’t have selected fact values. It can be useful for finding missing items while adding metadata.
In the Bwrite corpus, fact_name can also be used to select either theses or journal articles by searching for metadata that is only associated with those genres. For example, University to access all theses; or Publication to access all Journal Articles (and Yearbooks, if they are defined in the metadata).
In fact_name search you can add fact names to the search by using a drop-down menu and choosing the Operator for the search.
Filtering by using fact_value has even more options, returning only those documents that have the matching file name as well as a matching fact value.
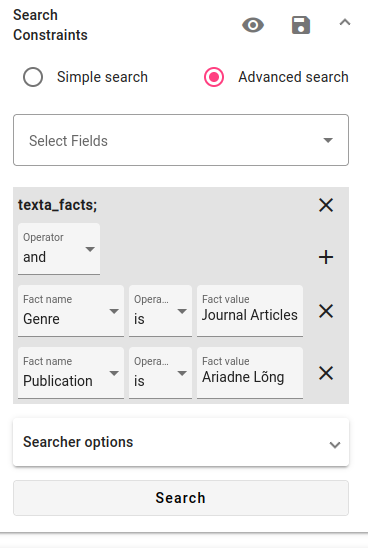
For example by selecting the genre and pressing on the plus sign, we can find journal articles from one publication. In the screenshot above we are looking for journal articles from the publication Ariadne Lõng.
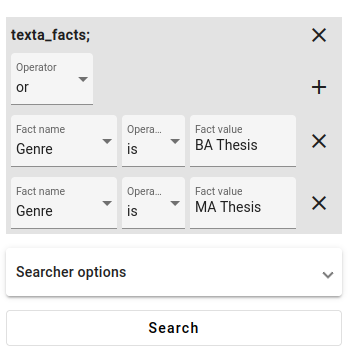
This type of search can also be used for different genres and metadata, for example finding all the MA theses at one University that were published during 2010-2019.
For fact values, you can also use the Operators and, or and not to pick and combine different searches.
Note
All combined searches have a default value of and when combining different fields.
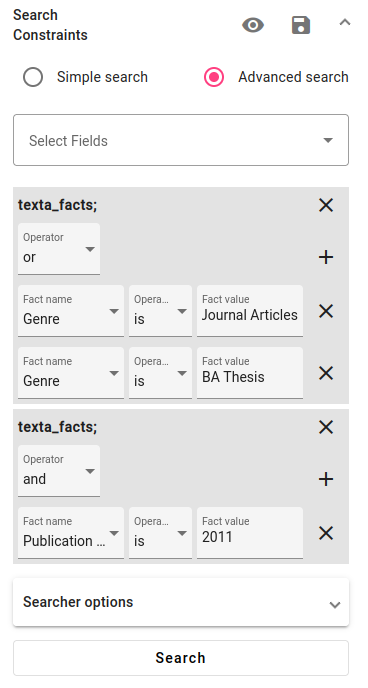
For example, the screenshot above is a query for documents in the Journal articles or BA thesis genres that have the publication year 2011.
If you want to get rid of any selected fields or fact values, press the X button.
Aggregations
Search queries can be used to aggregate metadata.
Note
The aggregations can be off for very large datasets due to Elasticsearch limitations, but it can still give you a rough overview of the data in those cases.
In this example of aggregations, a query will be used for finding all MA and BA theses in a smaller Estonian subcorpus.
Our research questions are to find out the most popular disciplines and publication years, as well as the proportion of MA and BA documents.
Make a search query. This is the example query:
Next, go to Aggregations, select the field texta_facts and aggregate by frequent items with a minimum number of 1 document and aggregation size of 1.
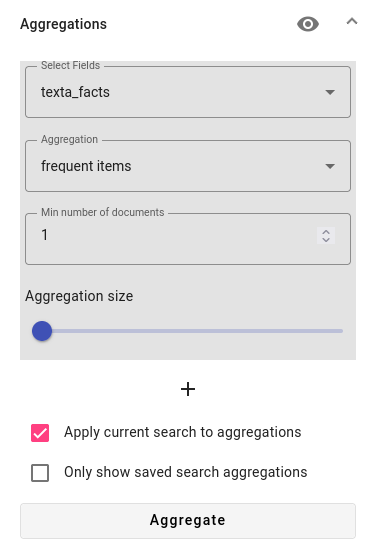
See that the option to apply the current search to aggregations is active, then press Aggregate.

In aggregations you can access metadata about the documents matching the query by clicking on any of the arrows pointing right (>).
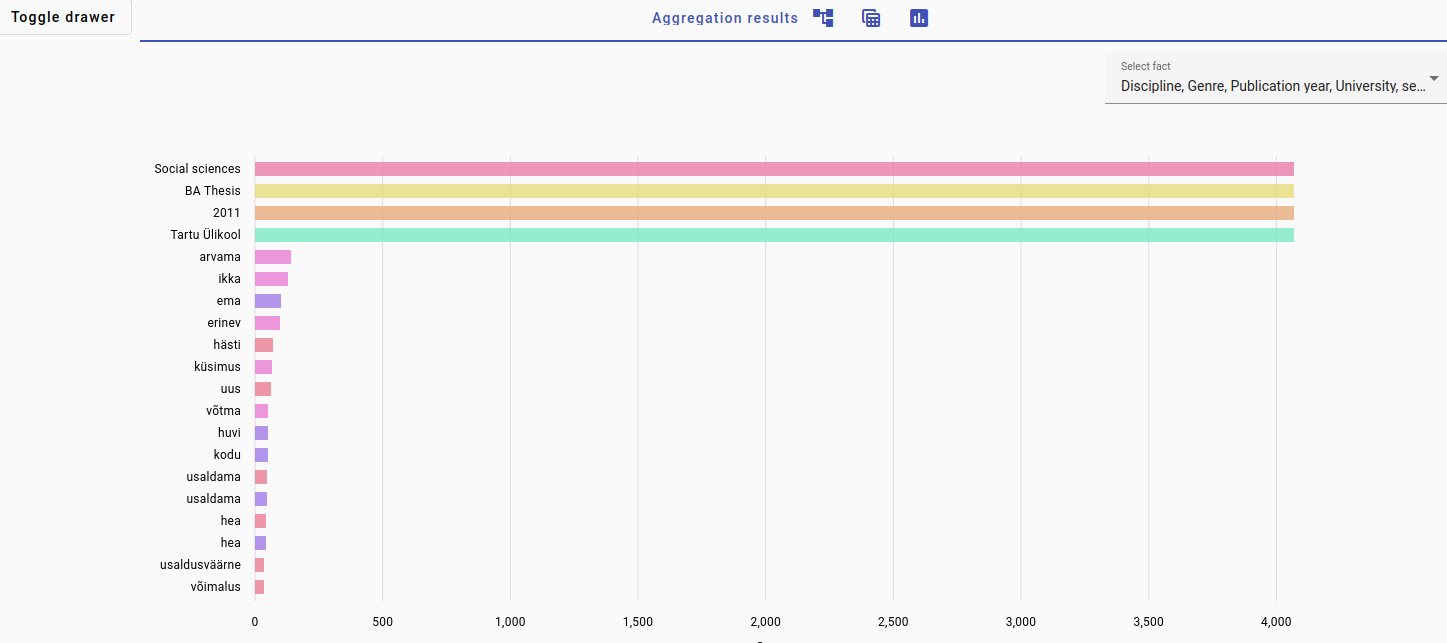
We are most interested in Discipline, Genre and Publication year, so we can safely ignore the University metadata.
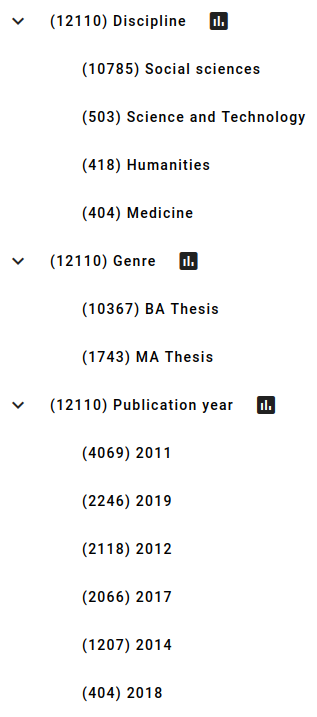
In this example, we can see that there are many more BA thesis documents than MA thesis documents.
An overwhelming amount of corpus documents are in the social sciences discipline and the publication year 2011 is the most popular for this dataset.
Aggregation options
You can view the aggregation in raw form using the eye icon (; debugging for advanced users) and add more fields to aggregate using the plus button.
Different types of fields have different aggregation options:
Texta_facts only have the option of frequent items.
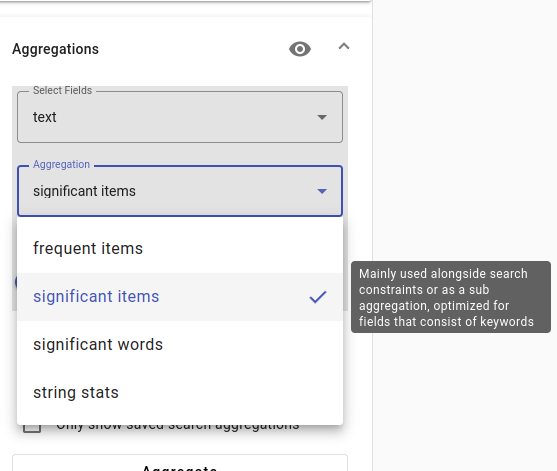
Any fields containing text have options for frequent items, significant items, significant words and string stats.
Any numerical fields have options for Extended stats and percentiles.
There are also aggregation options for date fields (but no date fields occur in this corpus at this point).
Aggregation overview
frequent items - displays items that are the most frequent based on statistical frequency
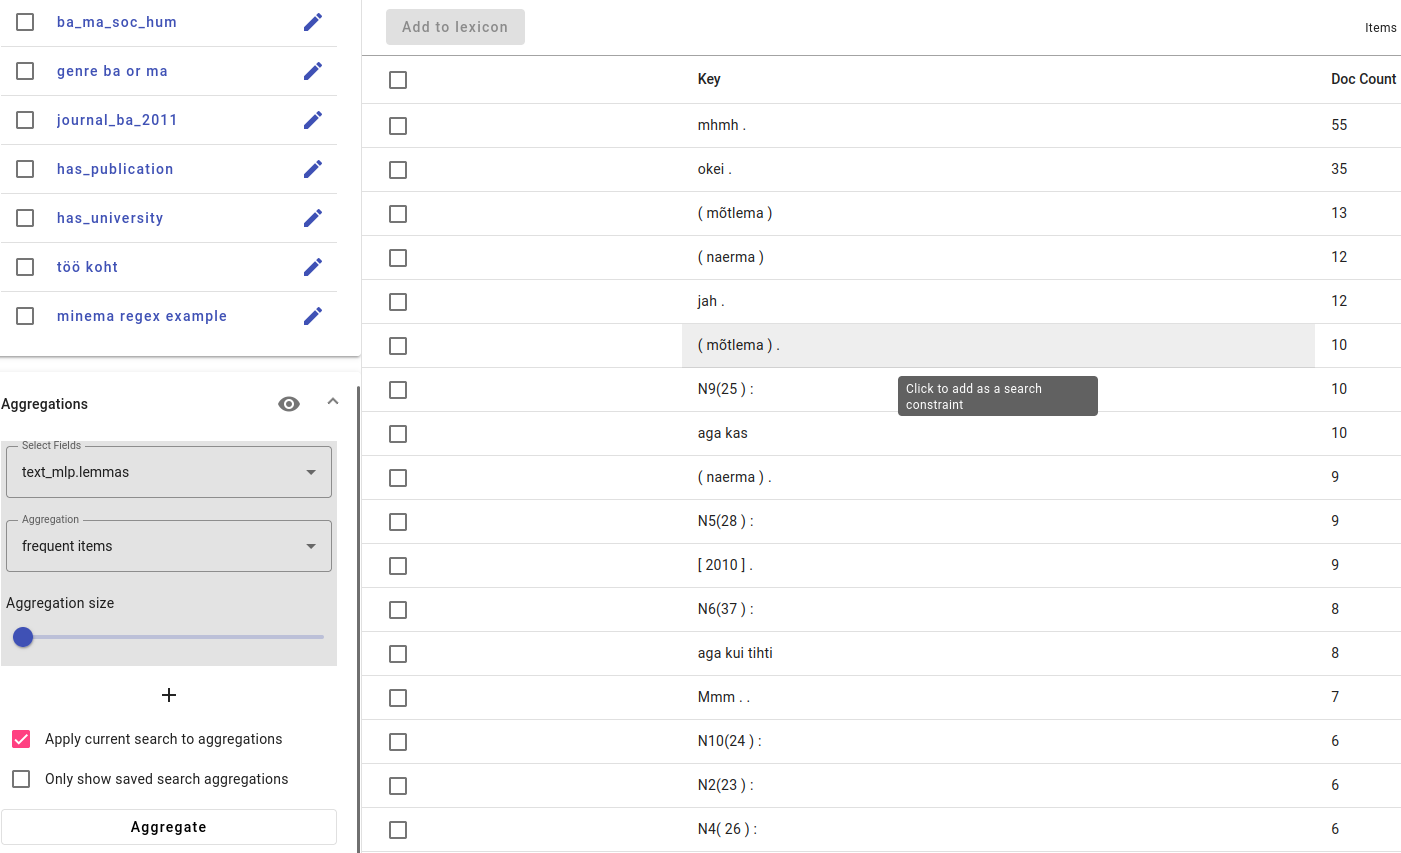
An example of frequent items in the lemmas field.
significant items - finds words that are different for the search query than the rest of the corpus for keyword fields.
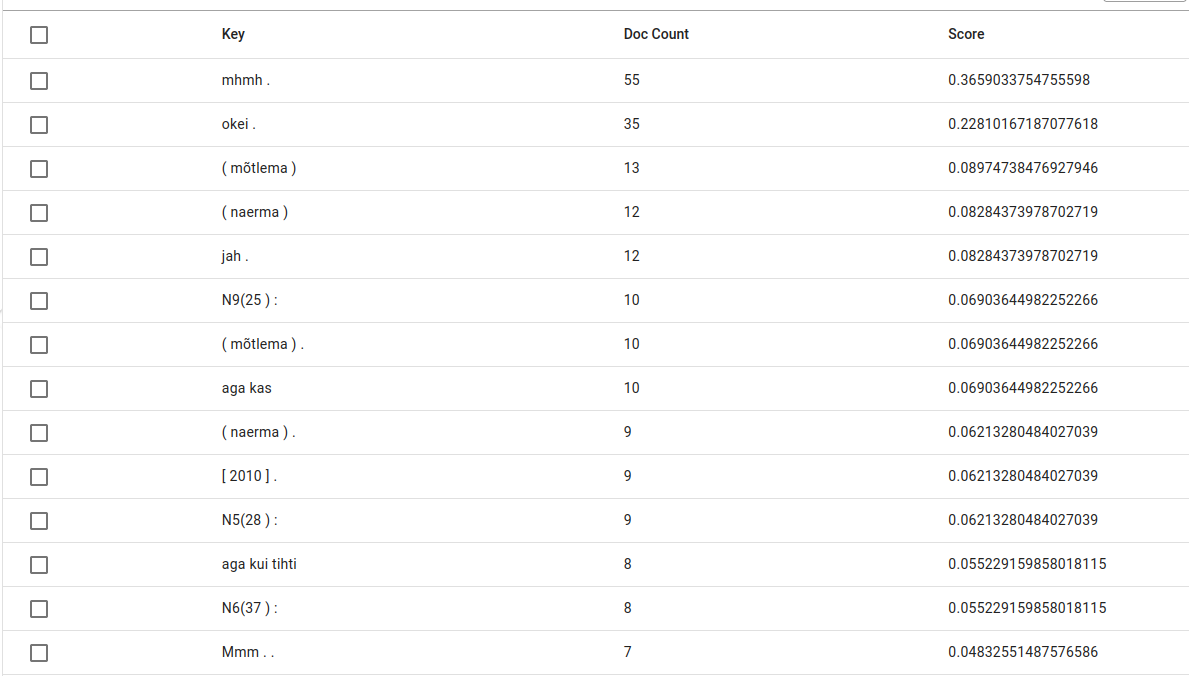
An example of significant items in the lemmas field.
significant words - finds words that are different for the search query than the rest of the corpus for longer text fields.
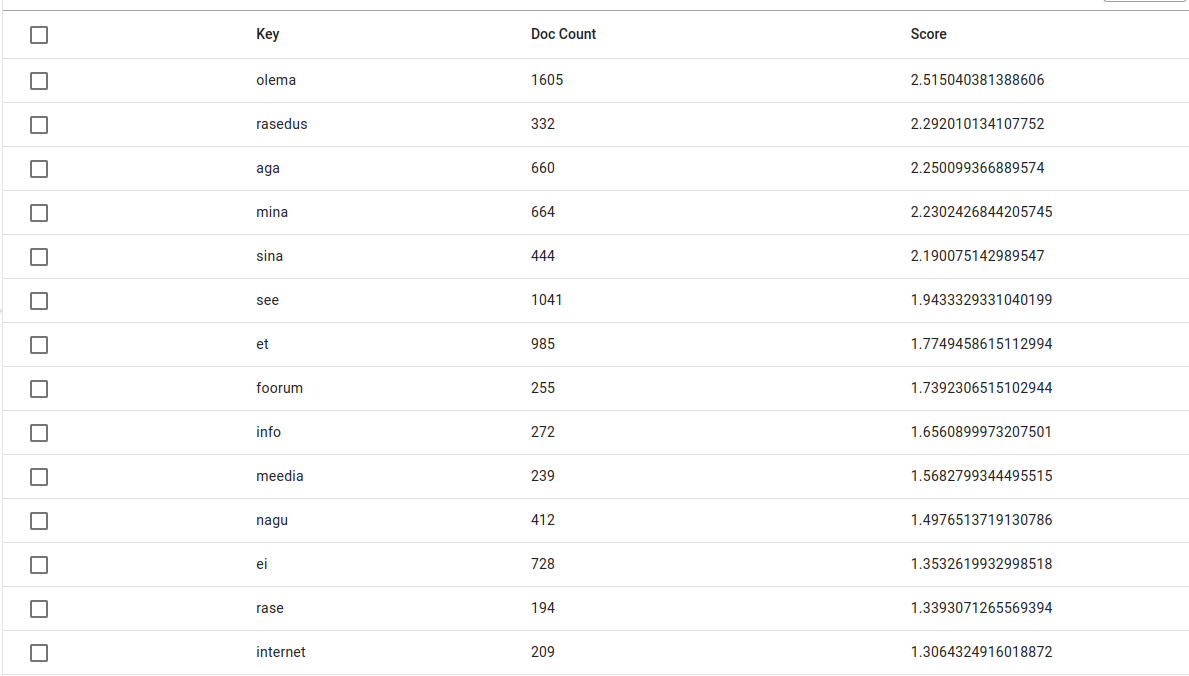
An example of significant words in the lemmas field.
string stats - this feature doesn’t work in this version of Elasticsearch
extended stats - statistics about numerical fields (for example, sum, average, minimum and maximum of selected field)
percentiles - shows percentiles for numerical fields.
For facts you can also view the results of an aggregation in table form or visualized as a plot by pressing the different icons next to the text Aggregation results.
You can also combine the results of different fields by pressing on the plus (+) button.
Note
For a very large amount of longer documents, the aggregation may not work or load very slowly. It is suggested to try out potential aggregations using smaller subsets or use shorter documents.
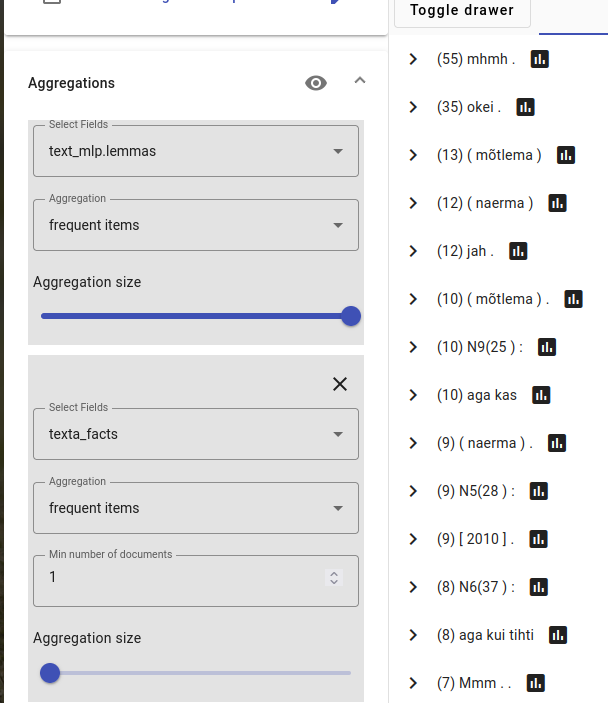
An example of combining lemmas/frequent items with facts/frequent items. The results show most frequent lemmas and fact values associated with those documents/lemmas.
Aggregation parameters
Aggregation size controls how many different terms or words are in the output (10-500).
Apply current search to aggregations allows you to create an aggregation with or without the search constraints.
Only show saved search aggregations allows you to aggregate together two different saved queries while ignoring the current search.
An example of two saved queries used to find significant lemmas.